Connecting to Actian Data Platform From Denodo via JDBC
Actian Corporation
June 1, 2019

The Actian Data Platform (formerly known as Avalanche) is the world’s fastest analytic data warehouse delivered as Software as a Service (SaaS). It has been designed for simplicity and doesn’t require any complex tuning to deliver consistent real-time performance for even the most challenging queries.
The Actian Data Platform is standards-based, supporting the latest SQL, ODBC and JDBC standards, which enables it to fit into any existing data eco-system easily.
This post shows how to connect to the Actian Data Platform from Denodo, using either the Actian Avalanche ODBC or JDBC driver.
If you have not done so already, you will need to put your IP addresses on the Allow List in the Actian Data Platform console (Manage > Update Allow List IPs).

If this is the first time you are attempting to connect to Actian Data Platform and you have not set password, you must do that in the Actian Data Platform Console (Manage > Set Connection Password).
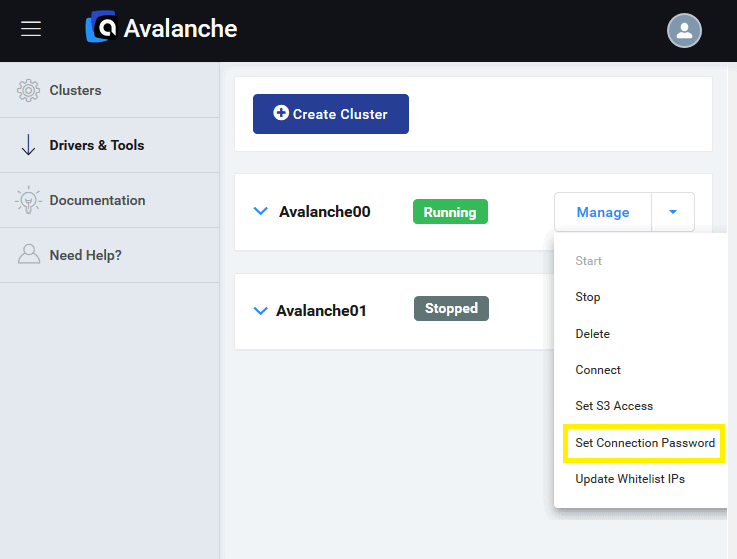
Here is how to create a database connection from Denodo to Actian Data Platform.
First, start Denodo Virtual DataPort Server from the Denodo Platform Control Center.
The connection can be defined using either of the following two methods:
Method 1: ODBC Connectivity
- Setting up the ODBC DSN
If not already done, create an ODBC DSN in the Windows ODBC Data Source Administrator.
In the Windows menu, go to Actian Client Runtime > Client Runtime CR 64-bit ODBC Data Source Administrator.
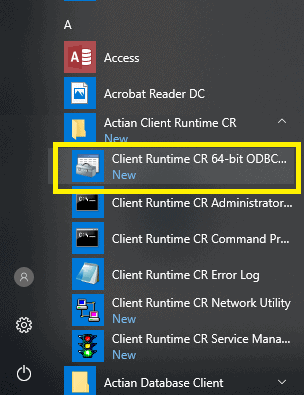
Create a System Data Source Name (DSN) to connect to your Actian Data Platform cluster. For example, you can name it “Actian DB”.
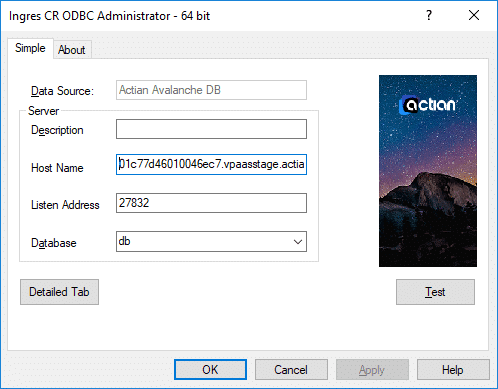
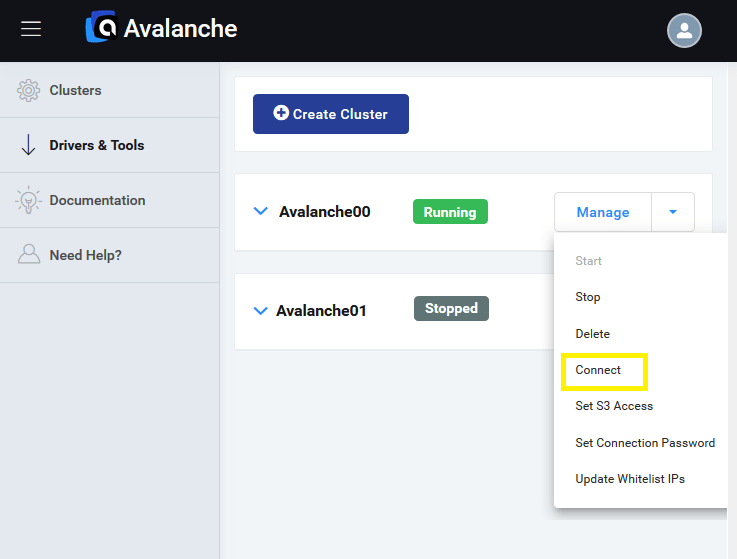
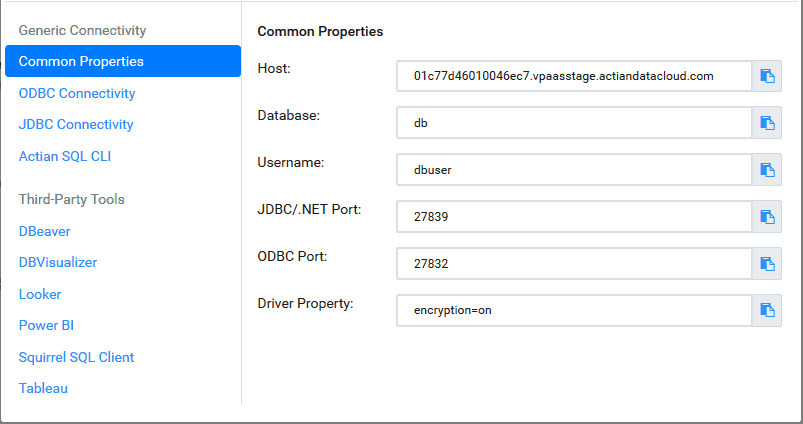
Take the Host Name and Listen Address from the Actian Data Platform Console Manage > Connect – Generic Connection Settings.
The Host Name value is the Host value and the Listen Address value is the ODBC port. For the Database, type db.
Example:
2. Creating the Denodo Data Source
Once the ODBC DSN is created, create a new Data Source by going to File > New > Data source…
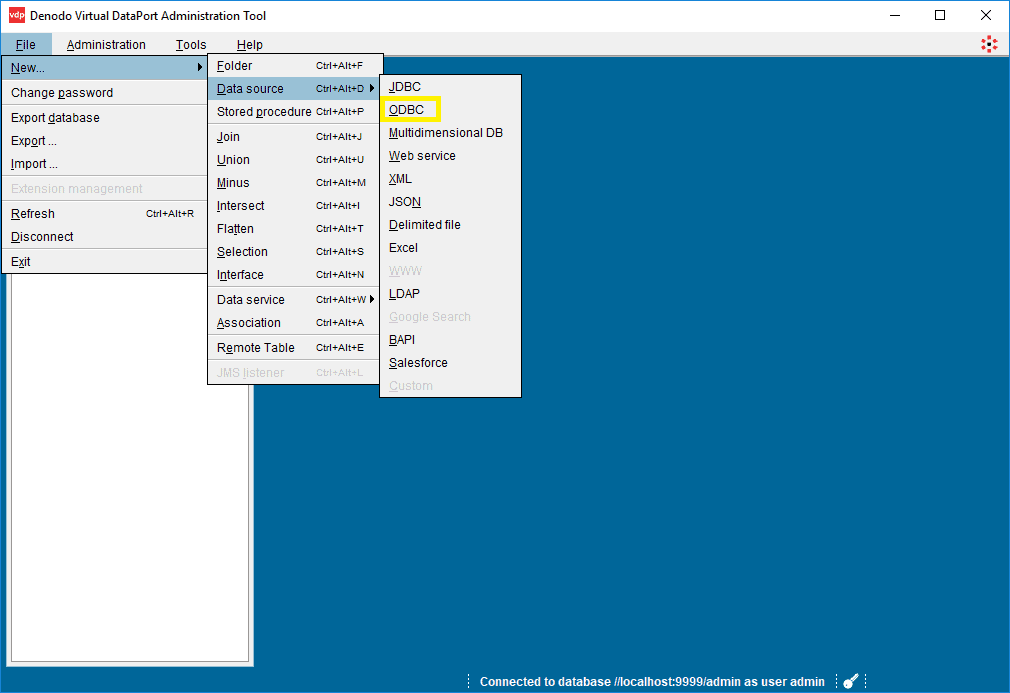
Select ODBC.
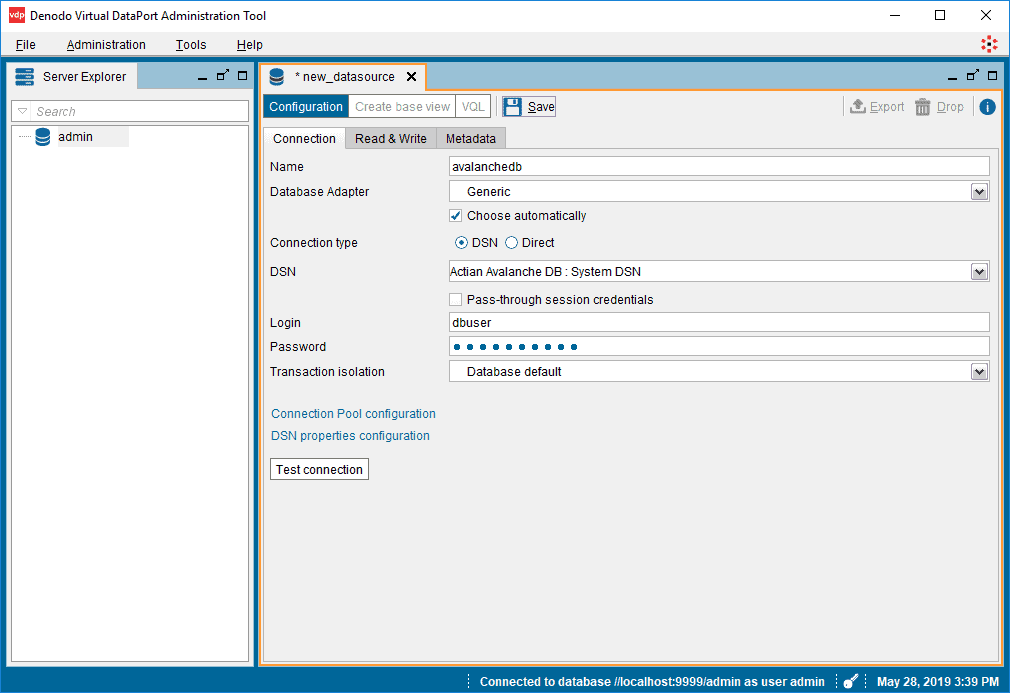
Provide a name for the database connection, e.g. actiandb.
Select Generic for the Database adapter.
Select DSN for the Connection type.
Select the Actian Data Platform DSN you created to connect to your instance of Actian Data Platform.
Enter your user name (dbuser) and password.
Click Save to save your data source.
Method 2: JDBC Connectivity
- Setting up the JDBC Driver
If you made the decision to use JDBC, a prerequisite is to have the Actian Data Platform JDBC driver downloaded and available in the environment where the tools run. The JDBC Driver is available via the Actian Data Platform console Drivers and Tools link.
Extract the downloaded JDBC package and place the extracted directory in the C:DenodoDenodoPlatform7.0libextensionsjdbc-drivers directory (where Denodo is installed) or in a directory you desire.
2. Creating the Denodo Data Source
After the JDBC driver has been placed in the expected location, create a new Denodo data source by going to File > New > Data source…

Select JDBC.

Provide a name for the database connection, e.g. ActianDB_JDBC.
Select Generic for the database adapter and Native (JDBC) for the type of access.
In the Driver class path field select the directory where the Actian Data Platform JDBC driver (iijdbc.jar) resides, by clicking on the Browse button.
For the driver class, type com.ingres.jdbc.IngresDriver.
Specify the JDBC Database URL, which is provided in the Actian Data Platform Cloud console (Manage > Connect).

Example:
jdbc:ingres://01c77d46010046ec7.vpaasstage.actiandatacloud.com:27839/db;encryption=on;
Provide the user name (dbuser) and password.
Now test the new data source to confirm that the connection is successful and that’s it!
To learn more about Actian Data Platform, our fully managed cloud data warehouse service, visit https://www.actian.com/data-platform/.
Subscribe to the Actian Blog
Subscribe to Actian’s blog to get data insights delivered right to you.
- Stay in the know – Get the latest in data analytics pushed directly to your inbox
- Never miss a post – You’ll receive automatic email updates to let you know when new posts are live
- It’s all up to you – Change your delivery preferences to suit your needs